We've been picking, sorting, chopping, pulping and pressing apples all morning as our cider making gets started.
As we stop for lunch, we have 2.5 gallons of apple juice in the first fermenter from about 35kg of apples. It's sweet but needs a little more acidity so we'll be adding cookers after lunch.
We only have another seven 25kg bags of apples to go...
It should give us 12-15 gallons of cider, so I'm going to have to get another couple of fermenters if I'm going to do the stout and barley wine as well.
Pics to follow.
Let the cider making commence!

I'm starting on monday as it's my birthday and it may have a little magic attached to it.I have about 100kg of apples all scrumped or begged Ive bramley two types of eaters and some crab apples. Today by chance met somebody who is grafting traditional lincolnshire varieties so will be buying some for the future.
-
Stonehead
- A selfsufficientish Regular

- Posts: 2432
- Joined: Wed Apr 12, 2006 2:31 pm
- Location: Scotland
- Contact:

Adding the sorted apples to the milling bucket. Any apples with serious blemishes go to the OH to have the bad bits cut out. Normally, we'd wash the apples thoroughly with lots of water, but our water shortage means a quick wash is all they get, which will mean changes to the way I normally make my cider.
Also, we normally make cider when all the apples are so ripe that you can push your thumb into them. A lack of rat-proof storage space this year means only about one-third are that ripe. The others are ripe enough to come off the tree and be eaten, but not as much as we'd normally like. That means less sugar content and either a less strong cider or, sacrilege, adding sugar.

Milling the apples. The bucket, of food-grade plastic, has a supposedly sealed lid with a hole in the middle. A sharp paddle sits inside the bucket with a shaft rising through the hole and then fastened into an electric drill.
You fill the bucket with apples, set your drill to the highest speed and then force the paddle down into the apples. It takes longer than you'd think and it's well worth stopping halfway through to add more apples.
In the picture I'm holding the lid on one handed, but it's better to have two people with one doing nothing but hold the lid on!
-
Stonehead
- A selfsufficientish Regular
- Posts: 2432
- Joined: Wed Apr 12, 2006 2:31 pm
- Location: Scotland
- Contact:

Loading the finely milled pomace into the press. We line the press with old but clean muslin cloths to stop too many bits going into the fermenter. If using old cloths, make sure they've been washed with old-fashioned soap flakes and rinsed thoroughly. (Laundry detergents and fabric softeners do not go well in cider.)
Fill the press to the bottom of the screw thread. Fold the cloth across the top, then place the circular wooden blocks on top of the cloth. Then stack the spacer blocks on top, then the compression plate and then screw down the handle.

Screwing down the press with the first juice running into the fermenter. With this type of press, do not empty it when the handle is first level with the top of the wooden sides - the pomace will not be fully compressed.
Instead, wind the handle back off. Take the blocks out, and add more fresh pomace up to the bottom of the thread again. Reassemble the press and screw it down again.
I find that even a second pressing still takes the handle right down to the top of the press, so I repeat the filling again.
With the third pressing, make sure that the press is well bolted down to a very secure surface or have an assistant hold it down. This is when you're going to do the final, hard press.
Wind the handle down as hard as you can until the handle will turn no more or the juice stops flowing. If you can't turn the handle any further, stop, have a cuppa and let the juice continue to trickle out.
When the juice has stopped flowing, unwind the handle, remove the blocks and remove the pomace.
NOTE: As the pomace is under a lot of pressure, you will get gouts of apple now and again. When doing this batch, some hit the ceiling and then fell on my back, as you can see in the photo. Cider making is a very messy job so do it outside or on a tiled, easily cleaned floor (as we do).
Last edited by Stonehead on Sat Sep 30, 2006 7:30 pm, edited 1 time in total.
-
Stonehead
- A selfsufficientish Regular
- Posts: 2432
- Joined: Wed Apr 12, 2006 2:31 pm
- Location: Scotland
- Contact:

Emptying the pomace into one of the pig buckets. This makes it look easy! We mix the pomace 50:50 with rolled barley and feed it to both the pigs and chickens, which all love it.
Once the fermenter is full to a little over the five-gallon mark, you can either pitch your yeast immediately (our normal practice) or add 1-2 Campden tablets per gallon. This kills off wild yeasts and bacteria that can lead to things like "mouse taint".
Good, well cleaned apples processed through sterilised equipment shouldn't need Campden tablets added. However, while our equipment was all sterilised, we didn't have enough clean water to thoroughly clean the apples, so we added five Campden tablets.
We'll leave the apple juice to sit until Monday morning (36 hours) to allow the Campden tablets time to kill off the nasties and spend itself. Then, we'll pitch the yeast. This means our cider won't be organic this year, but should mean that we don't have anything spoil the cider.
Once you've pitched the yeast, cover the fermenter and leave in a dark place with a temperature of at least 15C. This will give a long, slow fermentation.
If you want cider for Christmas, as we do, ferment above 19C and below 21C. The flavours won't be as developed, but it will still be good.
We're doing one batch of five gallons with a submersible heater set to 20C and cider yeast. This will be our Christmas/New Year batch. We'll do two more batches at 15C with wine yeasts and these will be for consumption well into next year.
-
Stonehead
- A selfsufficientish Regular
- Posts: 2432
- Joined: Wed Apr 12, 2006 2:31 pm
- Location: Scotland
- Contact:
The apple blend.
I know the sort of cider I'm after - very strong, dry, pronounced apple taste, lots of body with a hint of tannin and lots of complex flavours.
That means getting the right blend of apples. I use 60-70% sweets to get alcohol content, 20-30% sharps to get body and acidity, and 10% cookers/crabs/bittersharps to get tannin and acidity. I use different sweets and sharps to get the complex flavours. Unfortunately, I haven't found any bittersweets around here but I still get a pretty good result.
I taste each time I complete one crush and adjust my apple blend accordingly. When the juice is slightly oversweet for my palate, acidic enough to clean the palate but no more, with about as much tannin as a very weak cup of tea, and lots of flavours, I know I have a good base to be working with.
Cider yeast gives a slightly sweeter and less strong cider than I prefer (although still dry) while wine yeasts really deliver the punch and dryness I'm after. The OH doesn't mind my cider yeast version, but steers well clear of the wine yeast version.
-
Stonehead
- A selfsufficientish Regular
- Posts: 2432
- Joined: Wed Apr 12, 2006 2:31 pm
- Location: Scotland
- Contact:
We've had a slow start to the fermentation - enough to worry the OH who has yet to learn the art of patience. 
By late Tuesday, we had not had a bubble out of the cider. This is slow but not necessarily bad, so while I wasn't ready to intervene just yet I did a few tests by drawing off about half a pint of juice.
First, I started by putting a small amount of juice in a screw-top jar, adding a pinch of fast acting bread yeast, shaking vigorously and then left in a warm place. This checks if it's the juice or the brewing yeast that's the problem.
Second, I put another small amount of juice in a screw-top jar, added nothing and shook it vigorously. This checks to see if the problem is one of too little oxygenation of the yeast.
Third, I put yet more juice in yet another jar, added half a teaspoon of lemon juice, stirred gently and left it. This checks to see if the juice has high enough acidity.
Fourth, I put the last of the juice in a final jar, add a teaspoon of cold black tea, stirred gently and left it. This checks to see if the juice has enough tannin.
After two hours, jar one (with the bread yeast) was bubbling gently. A vigorous bubbling would be best but at least the juice was capable of being fermented.
Jar two, with nothing but agitation, produced a few small bubbles but nothing else. So, it wasn't oxygenation.
Jar three, with extra acid, produced slightly more bubbles than the oxygenation jar but still very few in total. So, no problem with the acidity.
Jar four, with the tea, was the same as jar three - slightly more bubbles than oxygenation but still very few in total. So, no problem with the tannin.
That pretty much left it in the hands of the yeast (Young's Cider Yeast) - warmth wasn't a factor as the original batch and all the samples were just over 20C.
So, I left it for another 24 hours and was rewarded last night with a sudden huge belch of gas. Then a few more over the space of a few hours and finally this morning the regular bubbling started.
I've used Young's cider yeast before and it usually takes about 24 hours to really kick off, but this batch of yeast was clearly a slow burner.
So, if your cider fermentation doesn't kick off on day one, day two or day three - don't be precipitate. By all means test some samples, but be patient, keep the cider warm and wait a little longer (although I'd consider intervening on the fourth day when the risk of the juice spoiling is becoming too great).

I started out on a beautiful morning which then turned into a very wet morning so I decided to move inside.I made this table so that I can bolt the press to it and it gives the height so that a bucket can be sat under it
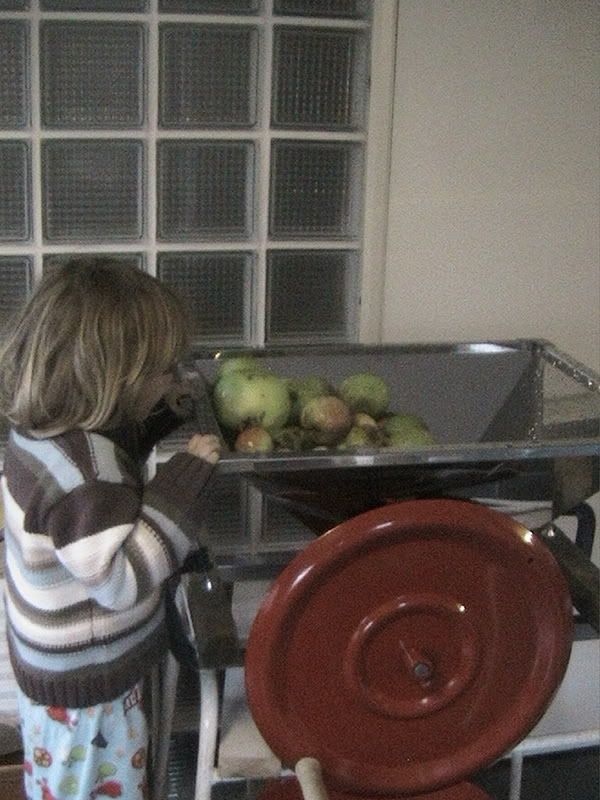
here is my son trying his best to get his hands chopped off.
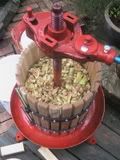
it works,half of the first press was rainwater

I attached the crusher to this old 50's table frame which I was just about to throw out this is a fantastic machine works well even full of apples.Although next time I think that I'll need a helper as it took all day I think I'll call it harvest moon as it was very late when I finished.
-
Shirley
- A selfsufficientish Regular
- Posts: 7025
- Joined: Fri Sep 30, 2005 9:05 am
- Location: Manchester
- Contact:
Stoney and Dibnah... this is GREAT, I love the step by step instructions with pictures, really makes it easy to understand what to do.
Blimey Dibs... that's some set up you've got there!!! Errmmm Dibs... did we miss your birthday?? Belated birthday greetings, hope you had a great day!
We want a cider press too - does size matter?
Blimey Dibs... that's some set up you've got there!!! Errmmm Dibs... did we miss your birthday?? Belated birthday greetings, hope you had a great day!
We want a cider press too - does size matter?
Shirley
NEEPS! North East Eco People's Site
My photos on Flickr
Don't forget to check out the Ish gallery on Flickr - and add your own photos there too. http://www.flickr.com/groups/selfsufficientish/
NEEPS! North East Eco People's Site
My photos on Flickr
Don't forget to check out the Ish gallery on Flickr - and add your own photos there too. http://www.flickr.com/groups/selfsufficientish/
-
PurpleDragon

- A selfsufficientish Regular
- Posts: 660
- Joined: Tue Jul 11, 2006 12:45 pm
- Location: Aberdeenshire, Scotland
-
Stonehead
- A selfsufficientish Regular
- Posts: 2432
- Joined: Wed Apr 12, 2006 2:31 pm
- Location: Scotland
- Contact:
We've had our little press for years - we'd never afford one now. But the bucket mill is very cheap (and fast).PurpleDragon wrote:Have you seen how much they are Shirley? I know buying decent stuff costs money, but - phew!
All you have to do then is build a press. It's not that difficult, especially if you have access to a blacksmith or metalworker to make the screw thread and metal bits for you.
-
Shirley
- A selfsufficientish Regular
- Posts: 7025
- Joined: Fri Sep 30, 2005 9:05 am
- Location: Manchester
- Contact:
Oooh now, we've got a blacksmith posting on Neeps! 
Thanks for that Stoney!!
Thanks for that Stoney!!
Shirley
NEEPS! North East Eco People's Site
My photos on Flickr
Don't forget to check out the Ish gallery on Flickr - and add your own photos there too. http://www.flickr.com/groups/selfsufficientish/
NEEPS! North East Eco People's Site
My photos on Flickr
Don't forget to check out the Ish gallery on Flickr - and add your own photos there too. http://www.flickr.com/groups/selfsufficientish/
-
PurpleDragon
- A selfsufficientish Regular
- Posts: 660
- Joined: Tue Jul 11, 2006 12:45 pm
- Location: Aberdeenshire, Scotland